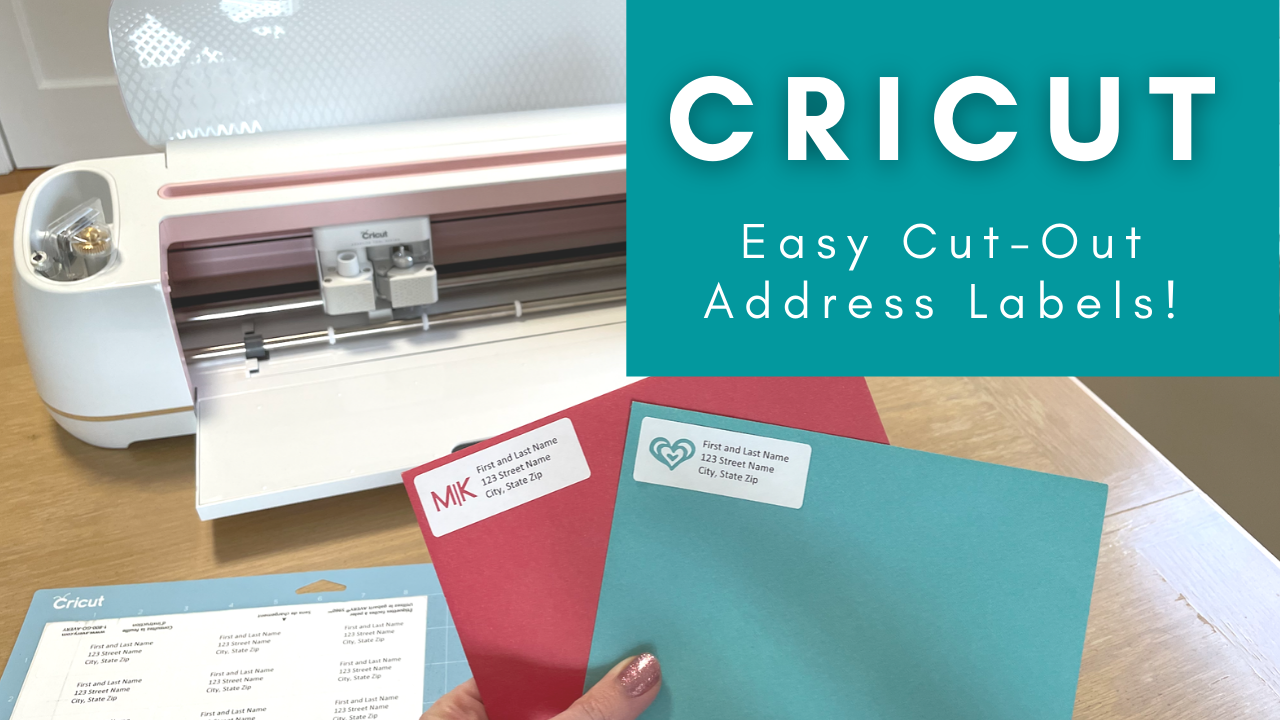
Cricut Tutorial: How to Make Cut Out Address Labels
Disclaimer: Some links provided are affiliate links and I receive a small commission when used. These commissions help to support the free content I offer!

Step 1. Format the Address Label Text
In this tutorial I am using the standard 30/labels per sheet address labels (1” x 2-5/8” each). These labels can be found on Amazon from various providers including Amazon Basics and Avery.
The first step is to print out the addresses on the address label sticker sheets. My preferred method for this is to use the Microsoft Word ‘Mailings’ feature to create address labels.
Within the ‘Mailings’ menu, select ‘Labels’. In the pop-up there are various options that can be chosen. I type the address in the top ‘Delivery Address’ box, select the 30/page label size, and select the full page of the same label option.

Step 2. Format the Address Label Text
Once the text for the 30 labels has been generated, the next step is to format the text so that there is room for a cut out to be added. Reformat each label so there is empty space on the left side of the label. This can be accomplished by using the keyboard ‘Tab’ function, or selecting ‘Align Right’ in the top toolbar.
Once they are formatted, print out the labels onto the address label paper.
I have included the formatted template that I used below.

Step 3. Upload Template into Cricut Design Space
Upload an address label template (saved as a jpg or png) into Cricut Design Space. The template I used is from the Avery Website.
**Note: You will need to save the template as a jpg or png to be able to upload it into Design Space. PDFs cannot be uploaded. To save a PDF as a jpg or png, open the PDF in a photo editing software then export it as a jpg or png (programs such as GIMP (mac) or Paint (windows)).
To upload the template into Cricut Design Space select:
New Project
Upload
Upload Image, browse for the template saved as a jpg or png
‘Simple’ Image Type
On the ‘Select and Erase’ page, do not select anything, simply press ‘Continue’
‘Save as a Print Then Cut Image’
Once the template is in Cricut Design Space, insert the image into the new project.
Scale the template image to be the size of the address label sheet (8.5” x 11”).

Step 4. Add the shapes and text that will be cut-out
Using the template as a placement guide add the shapes and text that will be cut out on the left side of each label.
Ensure that the text or shapes that are added are set to ‘Linetype’ Cut.
To make the process faster you can ‘Group’ and ‘Duplicate’ your designs.

Step 5. Final Formatting
Once all the designs have been placed hide the background template. To hide the background template, select the shape, then on the right side ‘Layers’ list click the eye icon next to where the template is listed.
Once the template is hidden click ‘Select All’ along the top toolbar to highlight all the remaining shapes and text, then select ‘Group’ at the top of the right ‘Layers’ list, lastly select ‘Attach’ at the bottom of the right ‘Layers’ list.

Step 6: Cut out the Labels
Click ‘Make It’ in the top of Cricut Design Space.
On the ‘Prepare Mats’ page, shift the shapes to be cut out so that the designs are aligned vertically along the center of each inch line (arrow pointing right showing ‘M|K’ aligned along the center of the 1” line). Along the horizontal axis, align the 3rd column of shapes along the center-right of the 6” line (arrow pointing down).
Select ‘Continue’.
Align the labels to match the placement on the Light Grip cutting mat.
Select the Washi Tape option, and start the Cricut Maker cut!